引言#
在AI技术蓬勃发展的当下,Spring生态推出了Spring AI项目,为Java开发者提供了便捷的AI集成方案。本文将演示如何用Spring AI+DeepSeek V3 快速搭建一个具备自然语言处理能力的智能对话机器人。
实现了Ai Agent的基本应用
一、环境准备#
JDK 17+
Maven/Gradle构建工具
DeepSeek API Key
由于各种原因官网的开放平台目前关闭了,我这里使用的是硅基流动+华为云推出的DeepSeek-V3/R1服务。
Spring Boot 3.2+
二、项目创建#
快速创建Spring AI项目可以参考:使用Spring Boot&Spring AI快速构建AI应用程序
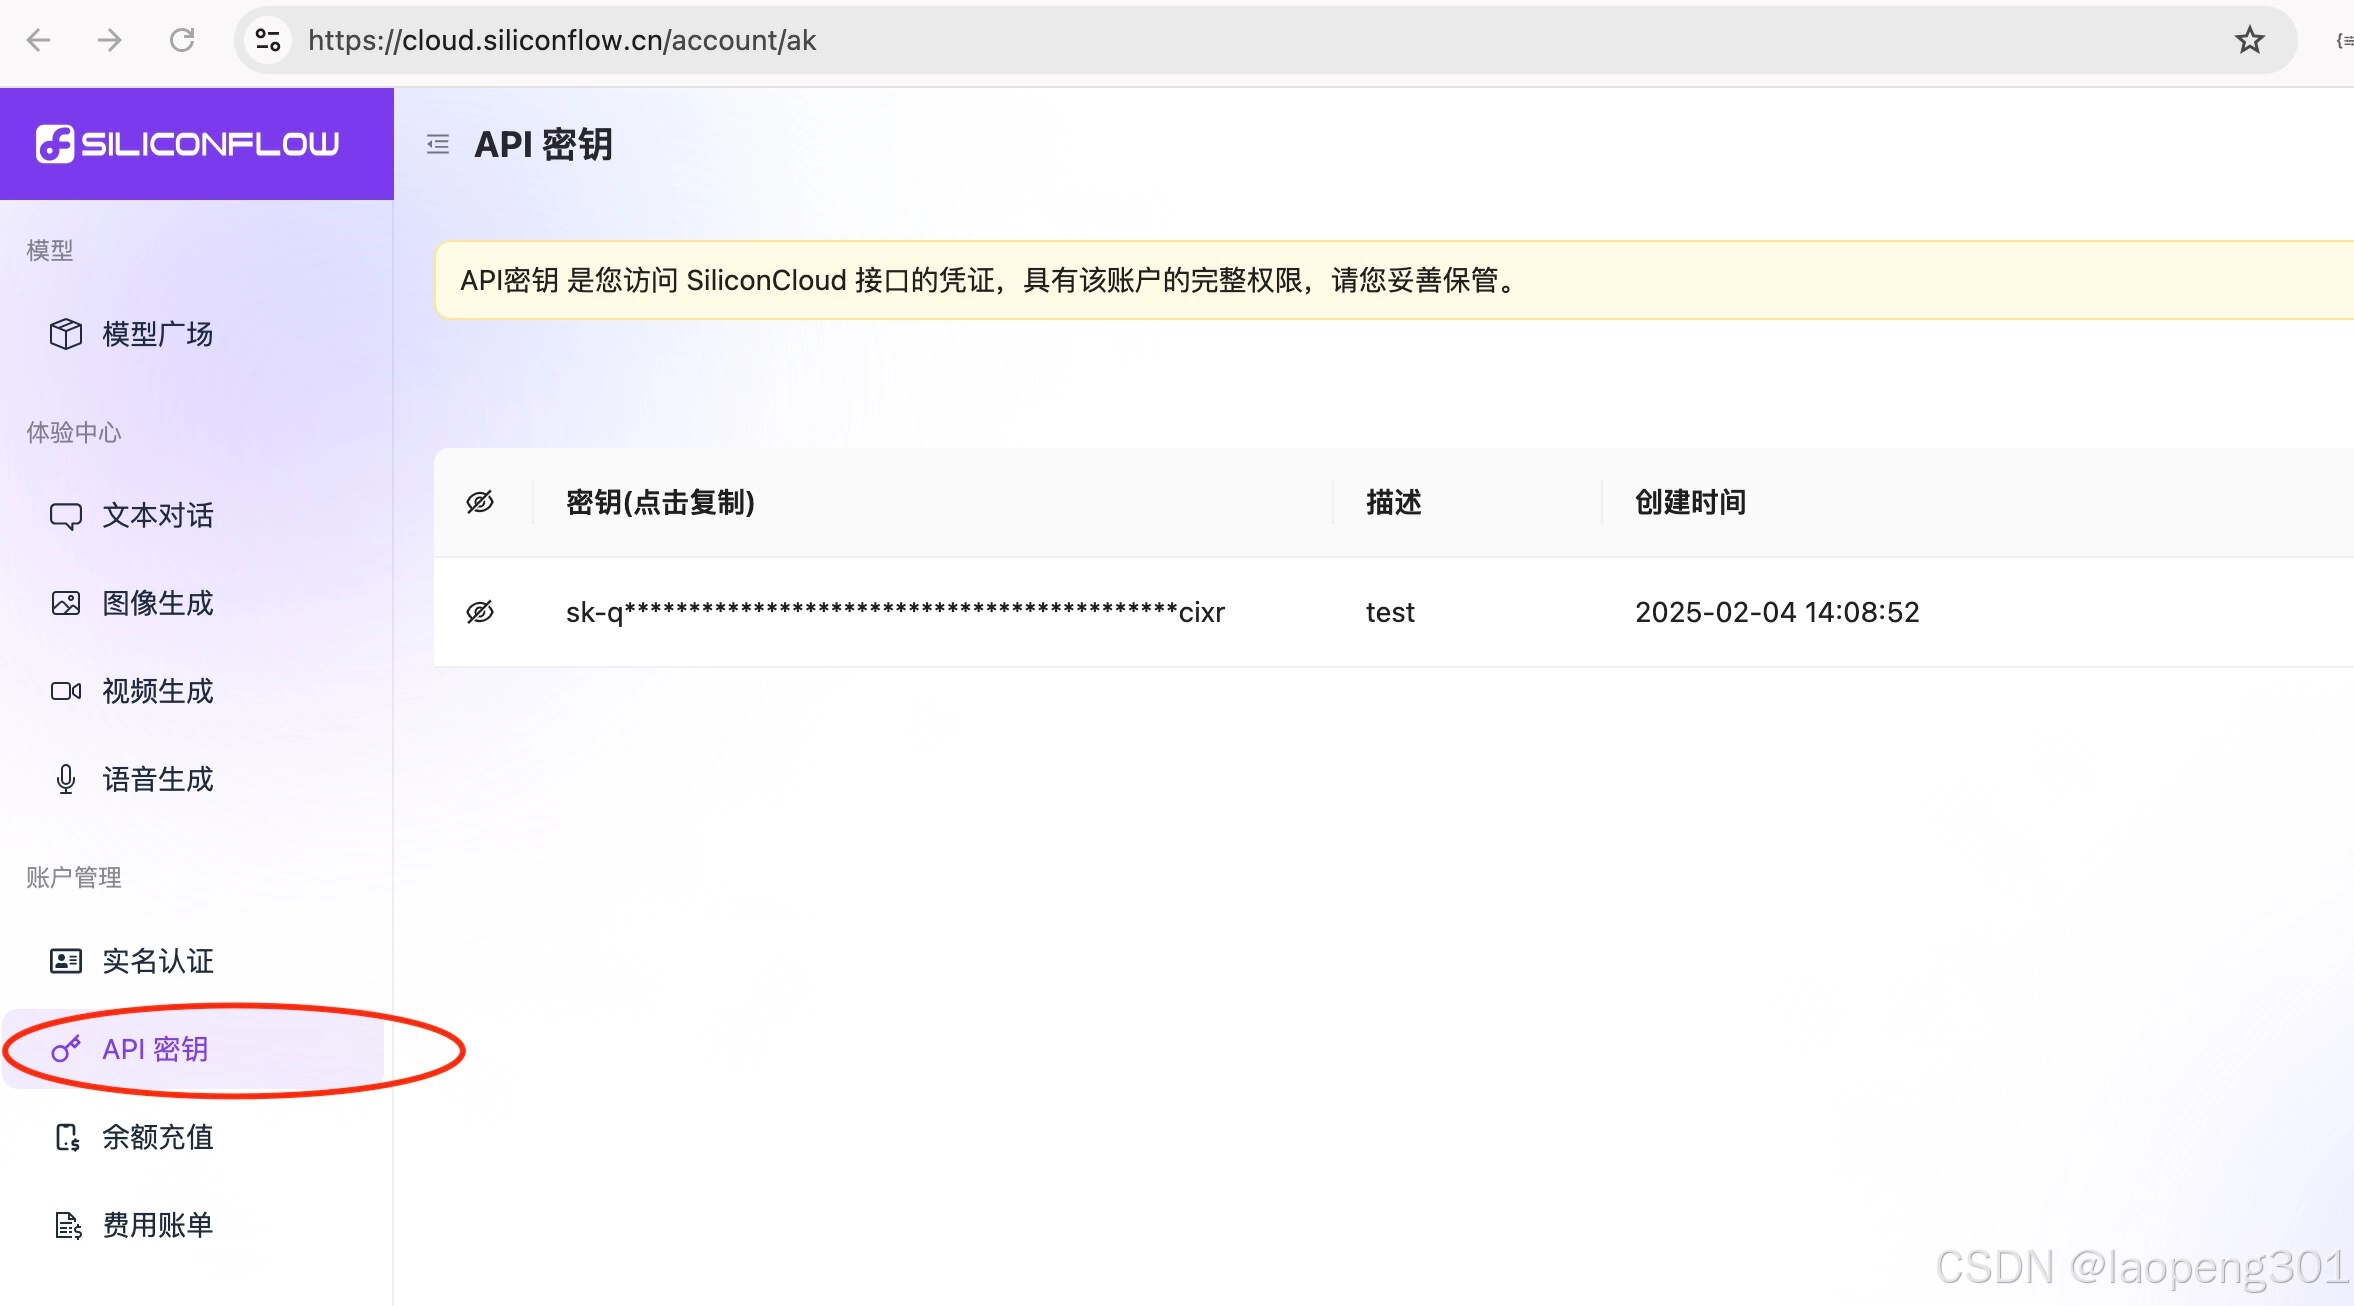
本项目使用的环境是:本文使用的开发工具IDEA+Spring Boot 3.4+Spring AI 1.0.0-SNAPSHOT+Maven+硅基流动提供的DeepSeek API服务,接口需要付费,默认注册送14块钱,官网。注册成功后创建密钥,如下图所示:
[
](https://i-blog.csdnimg.cn/direct/b66540166f2d414b885ad50214f6b56c.png)
在
application.properties添加如下配置:spring.ai.openai.base-url=https://api.siliconflow.cn/ spring.ai.openai.api-key=你自己的密钥 spring.ai.openai.chat.options.model=deepseek-ai/DeepSeek-V3 logging.level.org.springframework.ai.chat.client.advisor=DEBUG
pom.xml添加openai starter,因为接口是兼容openai api规范的。<dependency> <groupId>org.springframework.ai</groupId> <artifactId>spring-ai-openai-spring-boot-starter</artifactId> </dependency>
三、核心实现#
1.人设设定#
新建
Config配置类,设置智能体的人设。@Configuration class Config { @Bean ChatClient chatClient(ChatClient.Builder builder) { return builder.defaultSystem("你是一个智能机器人,你的名字叫 Spring AI智能机器人").build(); } }
2.流式对话#
新建
ChatbotController类,因为需要流式传输,后端需要支持流式响应,前端要能逐步接收并显示数据。可能需要使用Server-Sent Events(SSE)或者WebSocket。不过考虑到简单性,SSE可能更容易在Spring中实现,因为它是基于HTTP的,不需要额外的协议。@RestController @CrossOrigin("*") @Slf4j public class ChatbotController { private final ChatClient chatClient; public ChatbotController(ChatClient chatClient { this.chatClient = chatClient; } @PostMapping(value = "/chat/stream", produces = MediaType.TEXT_EVENT_STREAM_VALUE) public Flux<ServerSentEvent<String>> streamChat(@RequestBody ChatRequest request) { //用户id String userId = request.userId(); return chatClient.prompt(request.message()) .stream().content().map(content -> ServerSentEvent.builder(content).event("message").build()) //问题回答结速标识,以便前端消息展示处理 .concatWithValues(ServerSentEvent.builder("[DONE]").build()) .onErrorResume(e -> Flux.just(ServerSentEvent.builder("Error: " + e.getMessage()).event("error").build())); } record ChatRequest(String userId, String message) { } }
主要的技术细节:
- 使用标准
ServerSentEvent构建响应
- 增加结束标识
[DONE]事件
- 支持事件类型区分(
message/error)
接口测试:
 curl -X POST -H "Content-Type: application/json" -d '{"userId":"testuserid", "message":"你好"}' http://localhost:8080/chat/stream
event:message
data:你好
event:message
data:!
event:message
data:我是
event:message
data:Spring
event:message
data: AI
event:message
data:智能
event:message
data:机器人
event:message
data:,
event:message
data:很高兴
event:message
data:在这里
event:message
data:与你
event:message
data:交流
event:message
data:。
event:message
data:有什么
event:message
data:可以帮助
event:message
data:你的
event:message
data:吗
event:message
data:?
data:[DONE]
3.前端实现#
前端技术栈
Vite+Vue3+TS。Vite 是一个现代化的前端构建工具,支持 Vue 3 和 TypeScript。运行以下命令创建一个新项目:
npm create vite@latest
按照提示操作:
输入项目名称(
chatbot)。选择框架:
Vue。选择语言:
TypeScript。添加依赖
{
  "@microsoft/fetch-event-source": "^2.0.1"
    }
核心代码,完整代码地址:
<script setup lang="ts">
import {ref, reactive, onMounted, onBeforeUnmount, nextTick} from 'vue'
import {fetchEventSource} from '@microsoft/fetch-event-source'

// 生成随机用户ID(示例:8位字母数字组合)
const generateUserId = () => {
  return Math.random().toString(36).substr(2, 8);
};

// 持久化存储用户ID
const userId = ref('');

enum MessageStatus {
  Streaming = 'streaming',
  Complete = 'complete',
  Error = 'error',
}

interface Message {
  id: string
  content: string
  isBot: boolean
  status?: MessageStatus
  timestamp: number
  retry?: () => Promise<void>
}

const messages = ref<Message[]>([])
const inputMessage = ref('')
const isLoading = ref(false)
const controller = ref<AbortController>()
const messageContainer = ref<HTMLElement>()
const inputRef = ref<HTMLInputElement>()

// 自动滚动控制
let autoScroll = true
let lastCharType: 'chinese' | 'english' | 'other' = 'other'

const scrollToBottom = () => {
  nextTick(() => {
    if (messageContainer.value && autoScroll) {
      messageContainer.value.scrollTop = messageContainer.value.scrollHeight
    }
  })
}

const handleScroll = () => {
  if (!messageContainer.value) return
  const {scrollTop, scrollHeight, clientHeight} = messageContainer.value
  autoScroll = scrollHeight - (scrollTop + clientHeight) < 50
}

// 字符类型检测
const getCharType = (char: string): 'chinese' | 'english' | 'other' => {
  if (/[\u4e00-\u9fa5\u3000-\u303F\uFF00-\uFFEF]/.test(char)) {
    return 'chinese'
  }
  if (/[a-zA-Z]/.test(char)) {
    return 'english'
  }
  return 'other'
}

// 智能空格处理核心逻辑
const processContent = (prev: string, newData: string): string => {
  if (prev.length === 0) return newData

  const lastChar = prev.slice(-1)
  const newFirstChar = newData[0] || ''

  const prevType = getCharType(lastChar)
  const newType = getCharType(newFirstChar)

  let processed = newData

  // 需要添加空格的情况
  const shouldAddSpace =
      (prevType === 'english' && newType === 'english') || // 英文接英文
      (prevType === 'chinese' && newType === 'english') || // 中文接英文
      (prevType === 'english' && newType === 'chinese' && !/[!?,.]$/.test(lastChar)) // 英文接中文(非标点结尾)

  // 需要删除空格的情况
  const shouldRemoveSpace =
      (prevType === 'chinese' && newType === 'chinese') || // 中文接中文
      (prevType === 'other' && /^[\u4e00-\u9fa5]/.test(newData)) // 特殊符号接中文

  if (shouldAddSpace && !lastChar.match(/\s/) && !newFirstChar.match(/\s/)) {
    processed = ' ' + processed
  } else if (shouldRemoveSpace) {
    processed = processed.replace(/^\s+/, '')
  }

  return processed
}

const sendChatRequest = async (content: string, botMessage: Message) => {
  controller.value = new AbortController()

  await fetchEventSource('http://localhost:8080/chat/stream', {
    method: 'POST',
    headers: {
      'Content-Type': 'application/json',
      'Accept': 'text/event-stream',
      'X-Content-Lang': 'zh-CN'
    },
    body: JSON.stringify({message: content,userId:userId.value}),
    signal: controller.value?.signal,
    openWhenHidden: true,

    onopen: async response => {
      if (!response.ok) throw new Error(`HTTP error ${response.status}`)
    },

    onmessage: event => {
      if (event.data === '[DONE]') {
        botMessage.status = MessageStatus.Complete
        return
      }

      const processedData = processContent(botMessage.content, event.data)
      botMessage.content += processedData
      botMessage.timestamp = Date.now()

      // 更新最后字符类型
      const lastChar = processedData.slice(-1)
      lastCharType = getCharType(lastChar)

      scrollToBottom()
    },

    onerror: err => {
      throw err
    }
  })
}

// 错误处理
const handleRequestError = (botMessage: Message, error: unknown) => {
  const errorMessage = error instanceof Error
      ? navigator.onLine
          ? error.message
          : '网络连接不可用'
      : '请求发生未知错误'

  botMessage.status = MessageStatus.Error
  botMessage.content = errorMessage
  botMessage.retry = createRetryHandler(botMessage.content)
}

// 主发送逻辑
const sendMessage = async () => {
  if (!inputMessage.value.trim() || isLoading.value) return

  const userContent = inputMessage.value.trim()
  inputMessage.value = ''

  // 创建用户消息
  const userMessage = reactive<Message>({
    id: `user-${Date.now()}`,
    content: userContent,
    isBot: false,
    timestamp: Date.now()
  })
  messages.value.push(userMessage)

  // 创建机器人消息
  const botMessage = reactive<Message>({
    id: `bot-${Date.now()}`,
    content: '',
    isBot: true,
    status: MessageStatus.Streaming,
    timestamp: Date.now()
  })
  messages.value.push(botMessage)

  isLoading.value = true

  try {
    await sendChatRequest(userContent, botMessage)
  } catch (err) {
    handleRequestError(botMessage, err)
  } finally {
    isLoading.value = false
    nextTick(() => inputRef.value?.focus())
  }
}

// 停止生成
const stopGeneration = () => {
  controller.value?.abort()
  isLoading.value = false
}

// 生命周期
onMounted(() => {
  userId.value = localStorage.getItem('chatUserId') || generateUserId();
  localStorage.setItem('chatUserId', userId.value);
  messageContainer.value?.addEventListener('scroll', handleScroll)
  inputRef.value?.focus()
})

onBeforeUnmount(() => {
  messageContainer.value?.removeEventListener('scroll', handleScroll)
  controller.value?.abort()
})
</script>
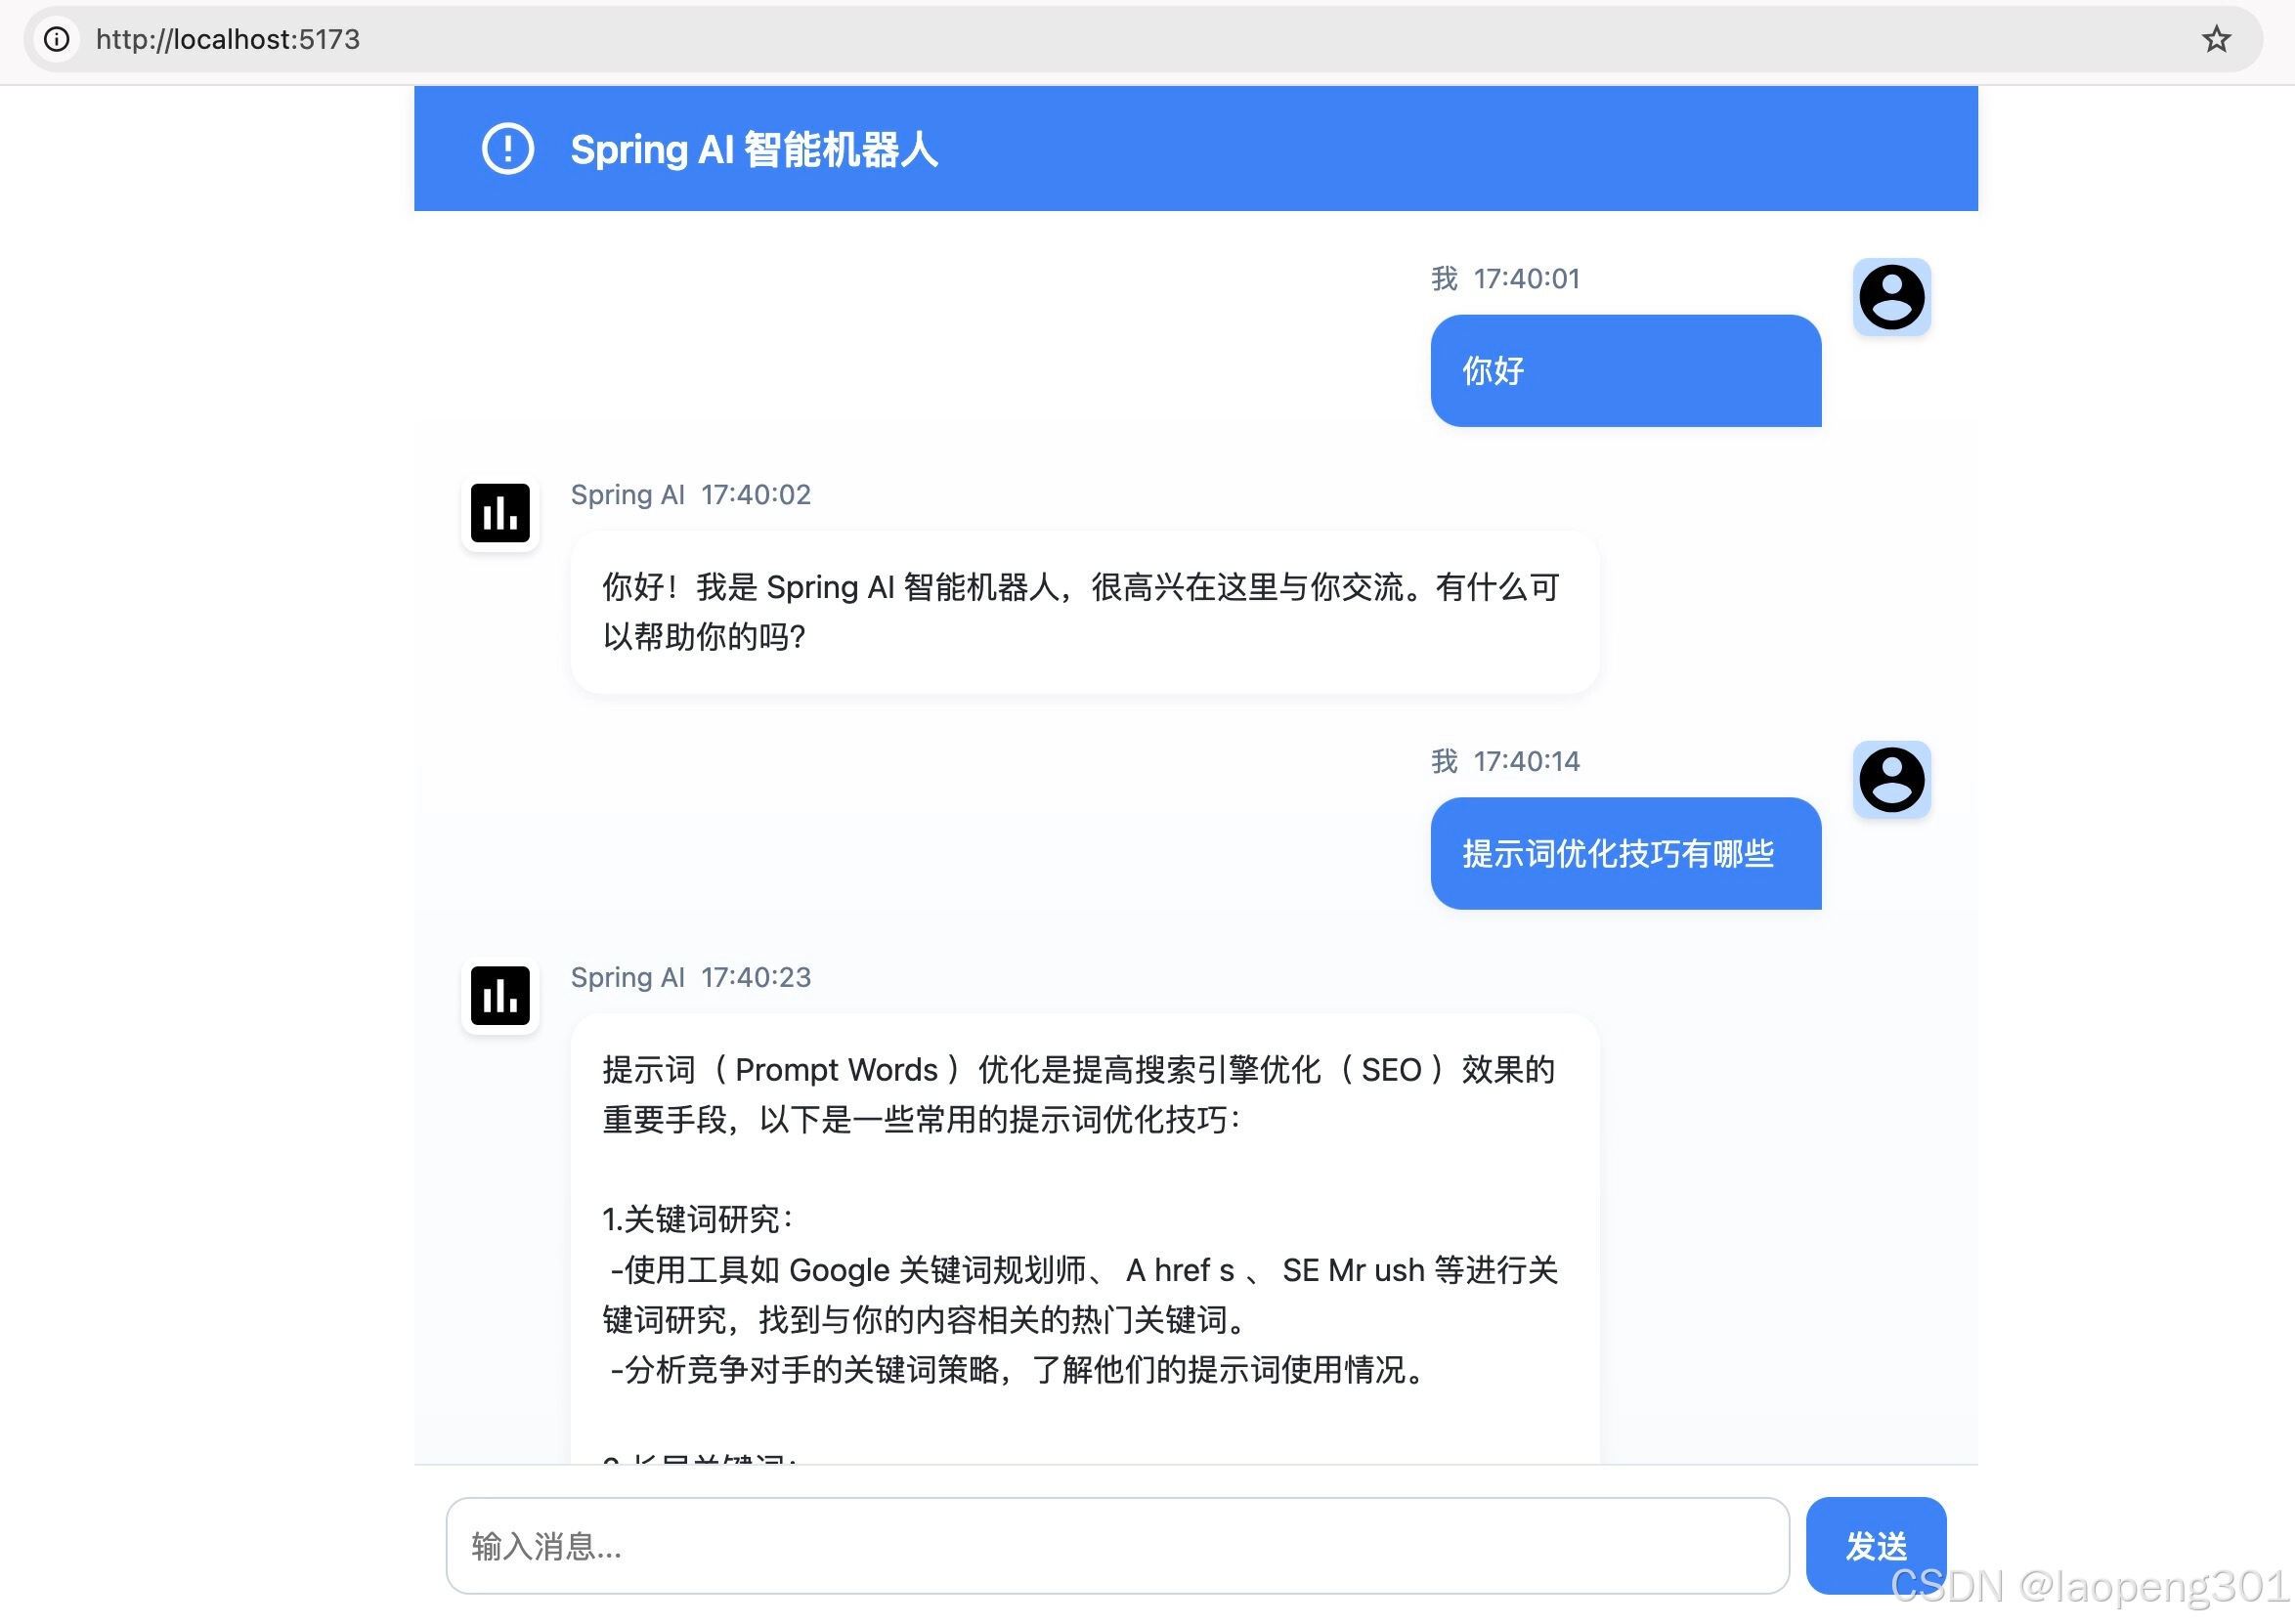
前端主要实现打字效果,然后针对中英文空格问题渲染问题。实现效果如下:
[
](https://i-blog.csdnimg.cn/direct/62e8b05a03eb4cd7b93ebf146974879d.png)
4.对话记忆(多轮对话)#
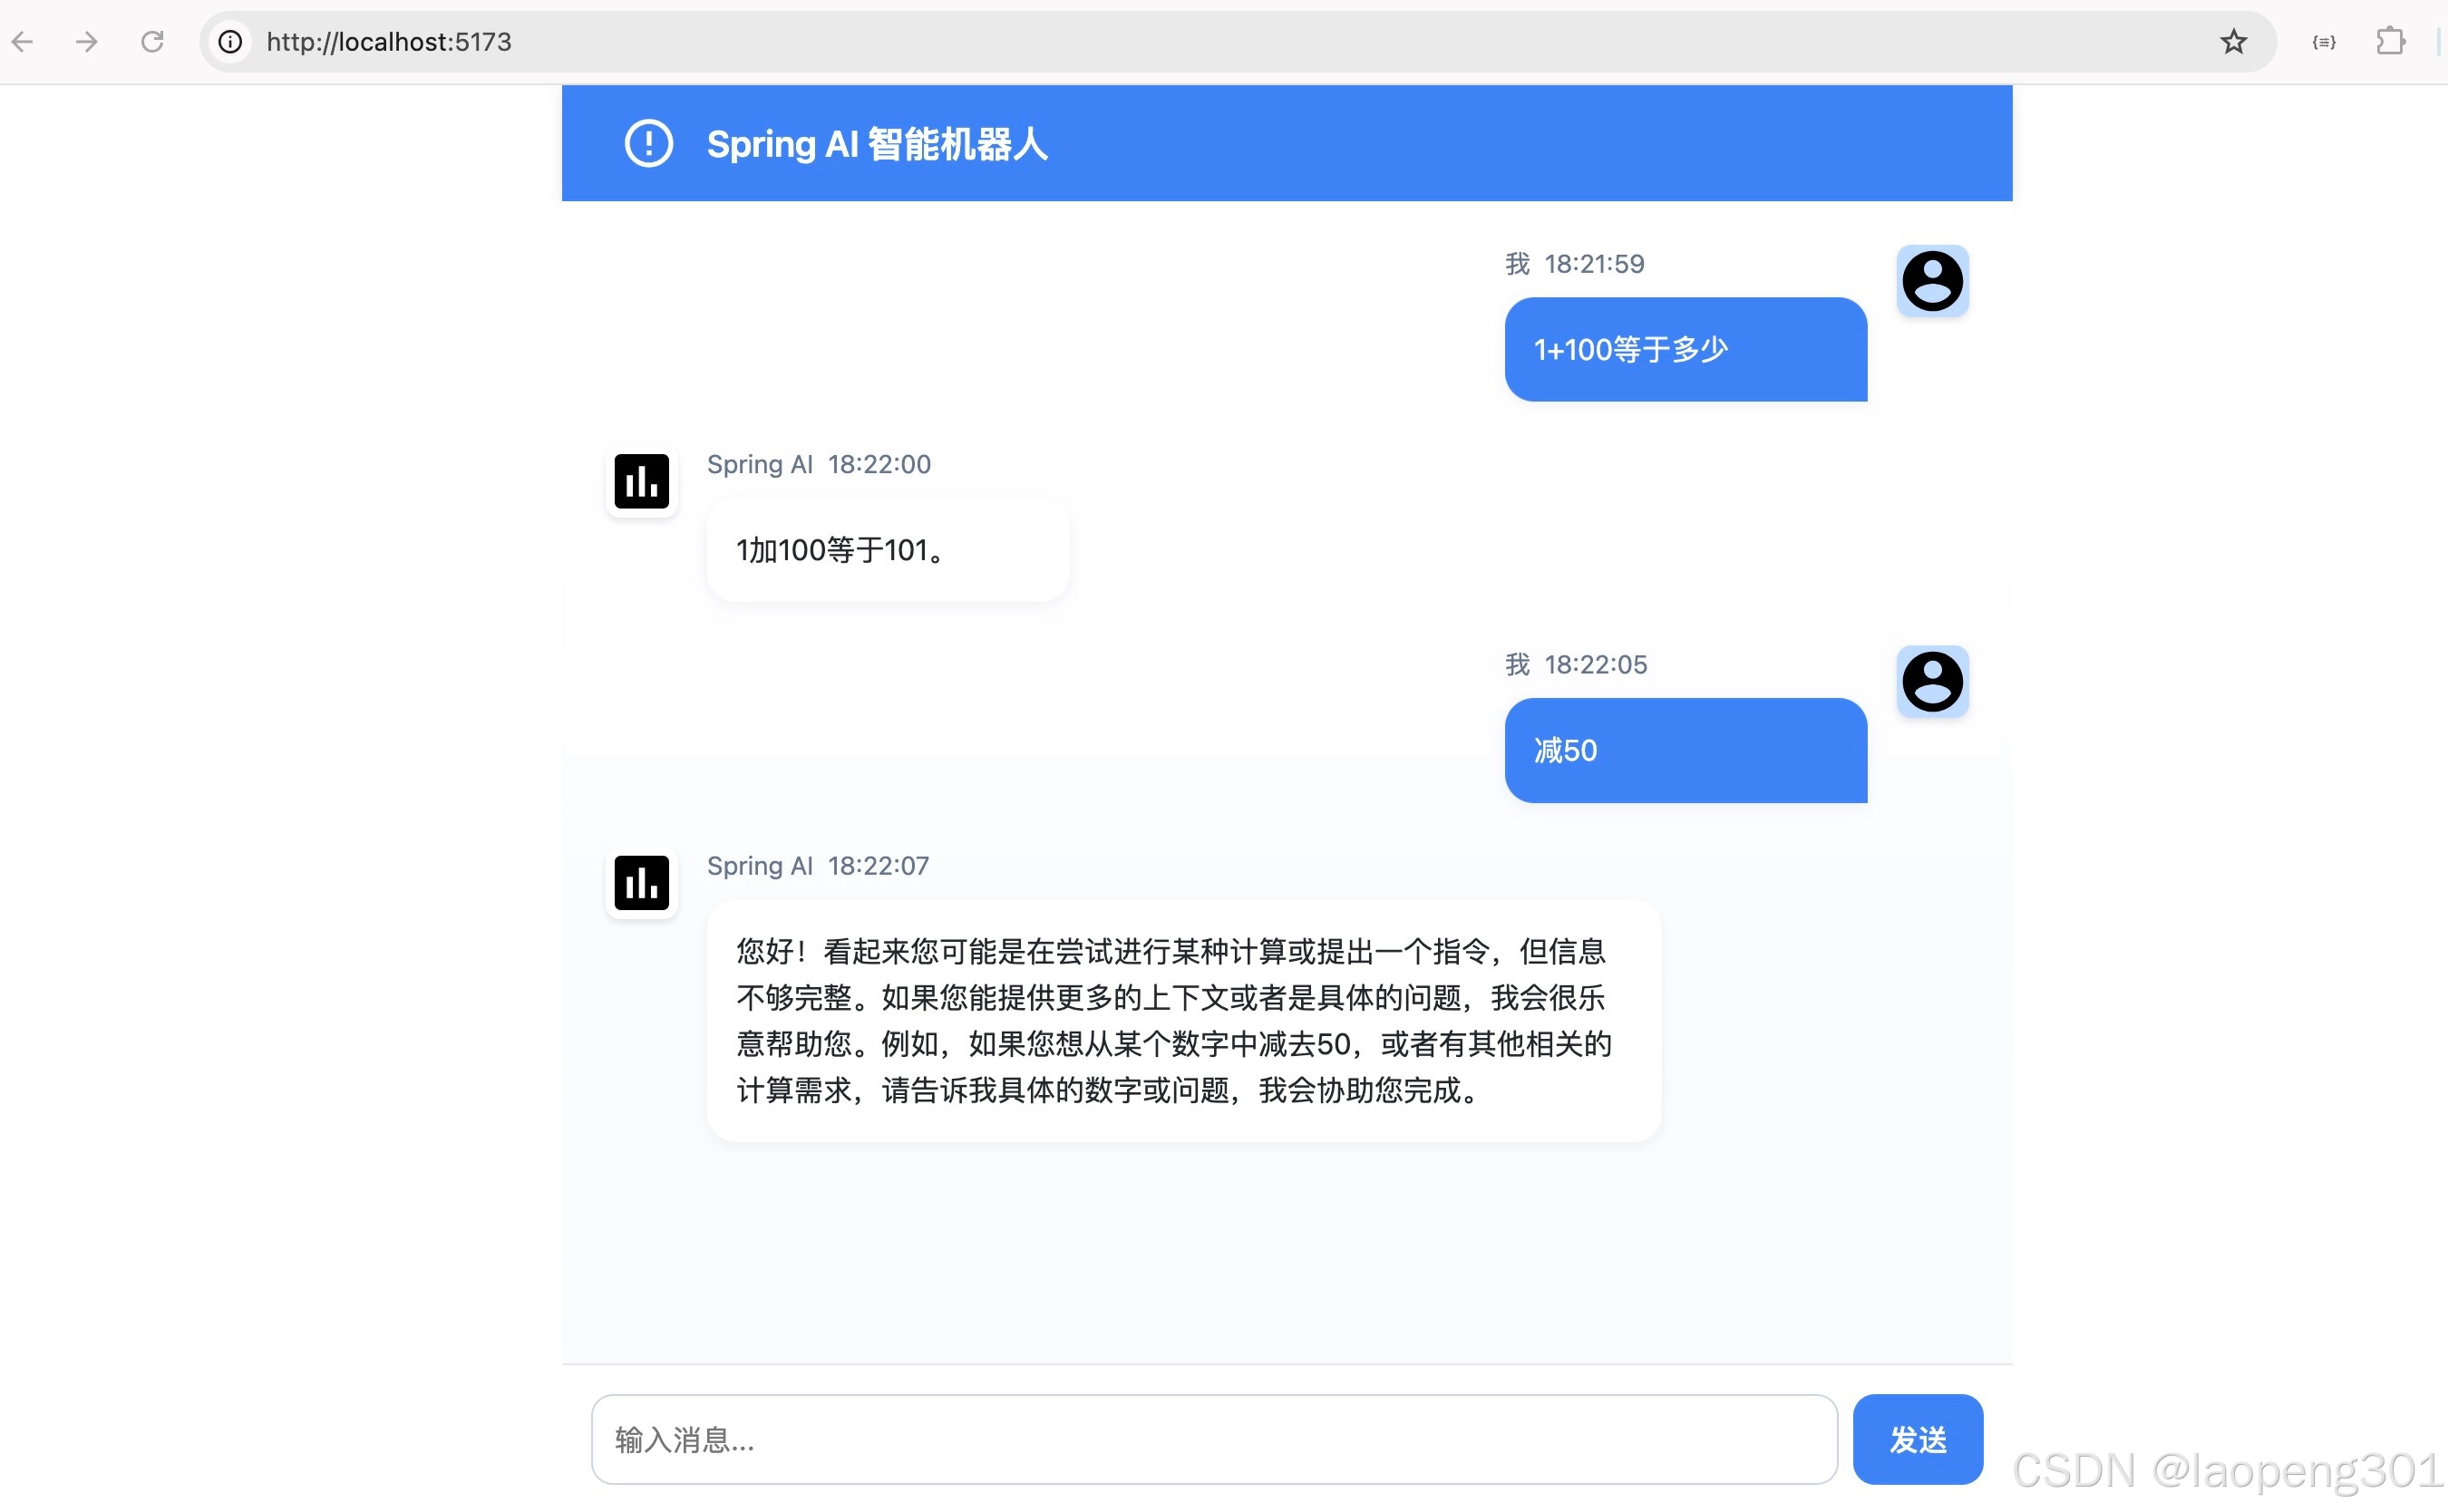
到目前为止对话实现,其实存在一个大问题,用户问问题每次都是新的一次对话,无法做到多轮次,就是常说的对话记忆,如下图所示问题所在:
[
](https://i-blog.csdnimg.cn/direct/2655d7a0b4ce4034a2462d7c430c50e9.png)
如上图所示,大模型两次回复是独立的,没有形成对话记忆,要实现这个功能,Spring AI提供了Advisors API,
MessageChatMemoryAdvisor主要实现对话记忆,本文基于内存的方式,首先Config类新增内存记忆的Bean。@Configuration class Config { @Bean ChatClient chatClient(ChatClient.Builder builder) { return builder.defaultSystem("你是一个智能机器人,你的名字叫 Spring AI智能机器人").build(); } @Bean InMemoryChatMemory inMemoryChatMemory() { return new InMemoryChatMemory(); } }
对话接口修改如下:
 @PostMapping(value = "/chat/stream", produces = MediaType.TEXT_EVENT_STREAM_VALUE)
    public Flux<ServerSentEvent<String>> streamChat(@RequestBody ChatRequest request) {
        //用户id
        String userId = request.userId();

        return chatClient.prompt(request.message())
                .advisors(new MessageChatMemoryAdvisor(inMemoryChatMemory, userId, 10), new SimpleLoggerAdvisor())
                .stream().content().map(content -> ServerSentEvent.builder(content).event("message").build())
                //问题回答结速标识,以便前端消息展示处理
                .concatWithValues(ServerSentEvent.builder("[DONE]").build())
                .onErrorResume(e -> Flux.just(ServerSentEvent.builder("Error: " + e.getMessage()).event("error").build()));
    }
核心代码分析:
new MessageChatMemoryAdvisor(inMemoryChatMemory, userId, 10)
对话添加一个上下文记忆增强,每个用户数据是隔离的,10表示历史对话数据最多取10条,每次向大模型发送消息,实际上会把用户前面的问题一起组装到
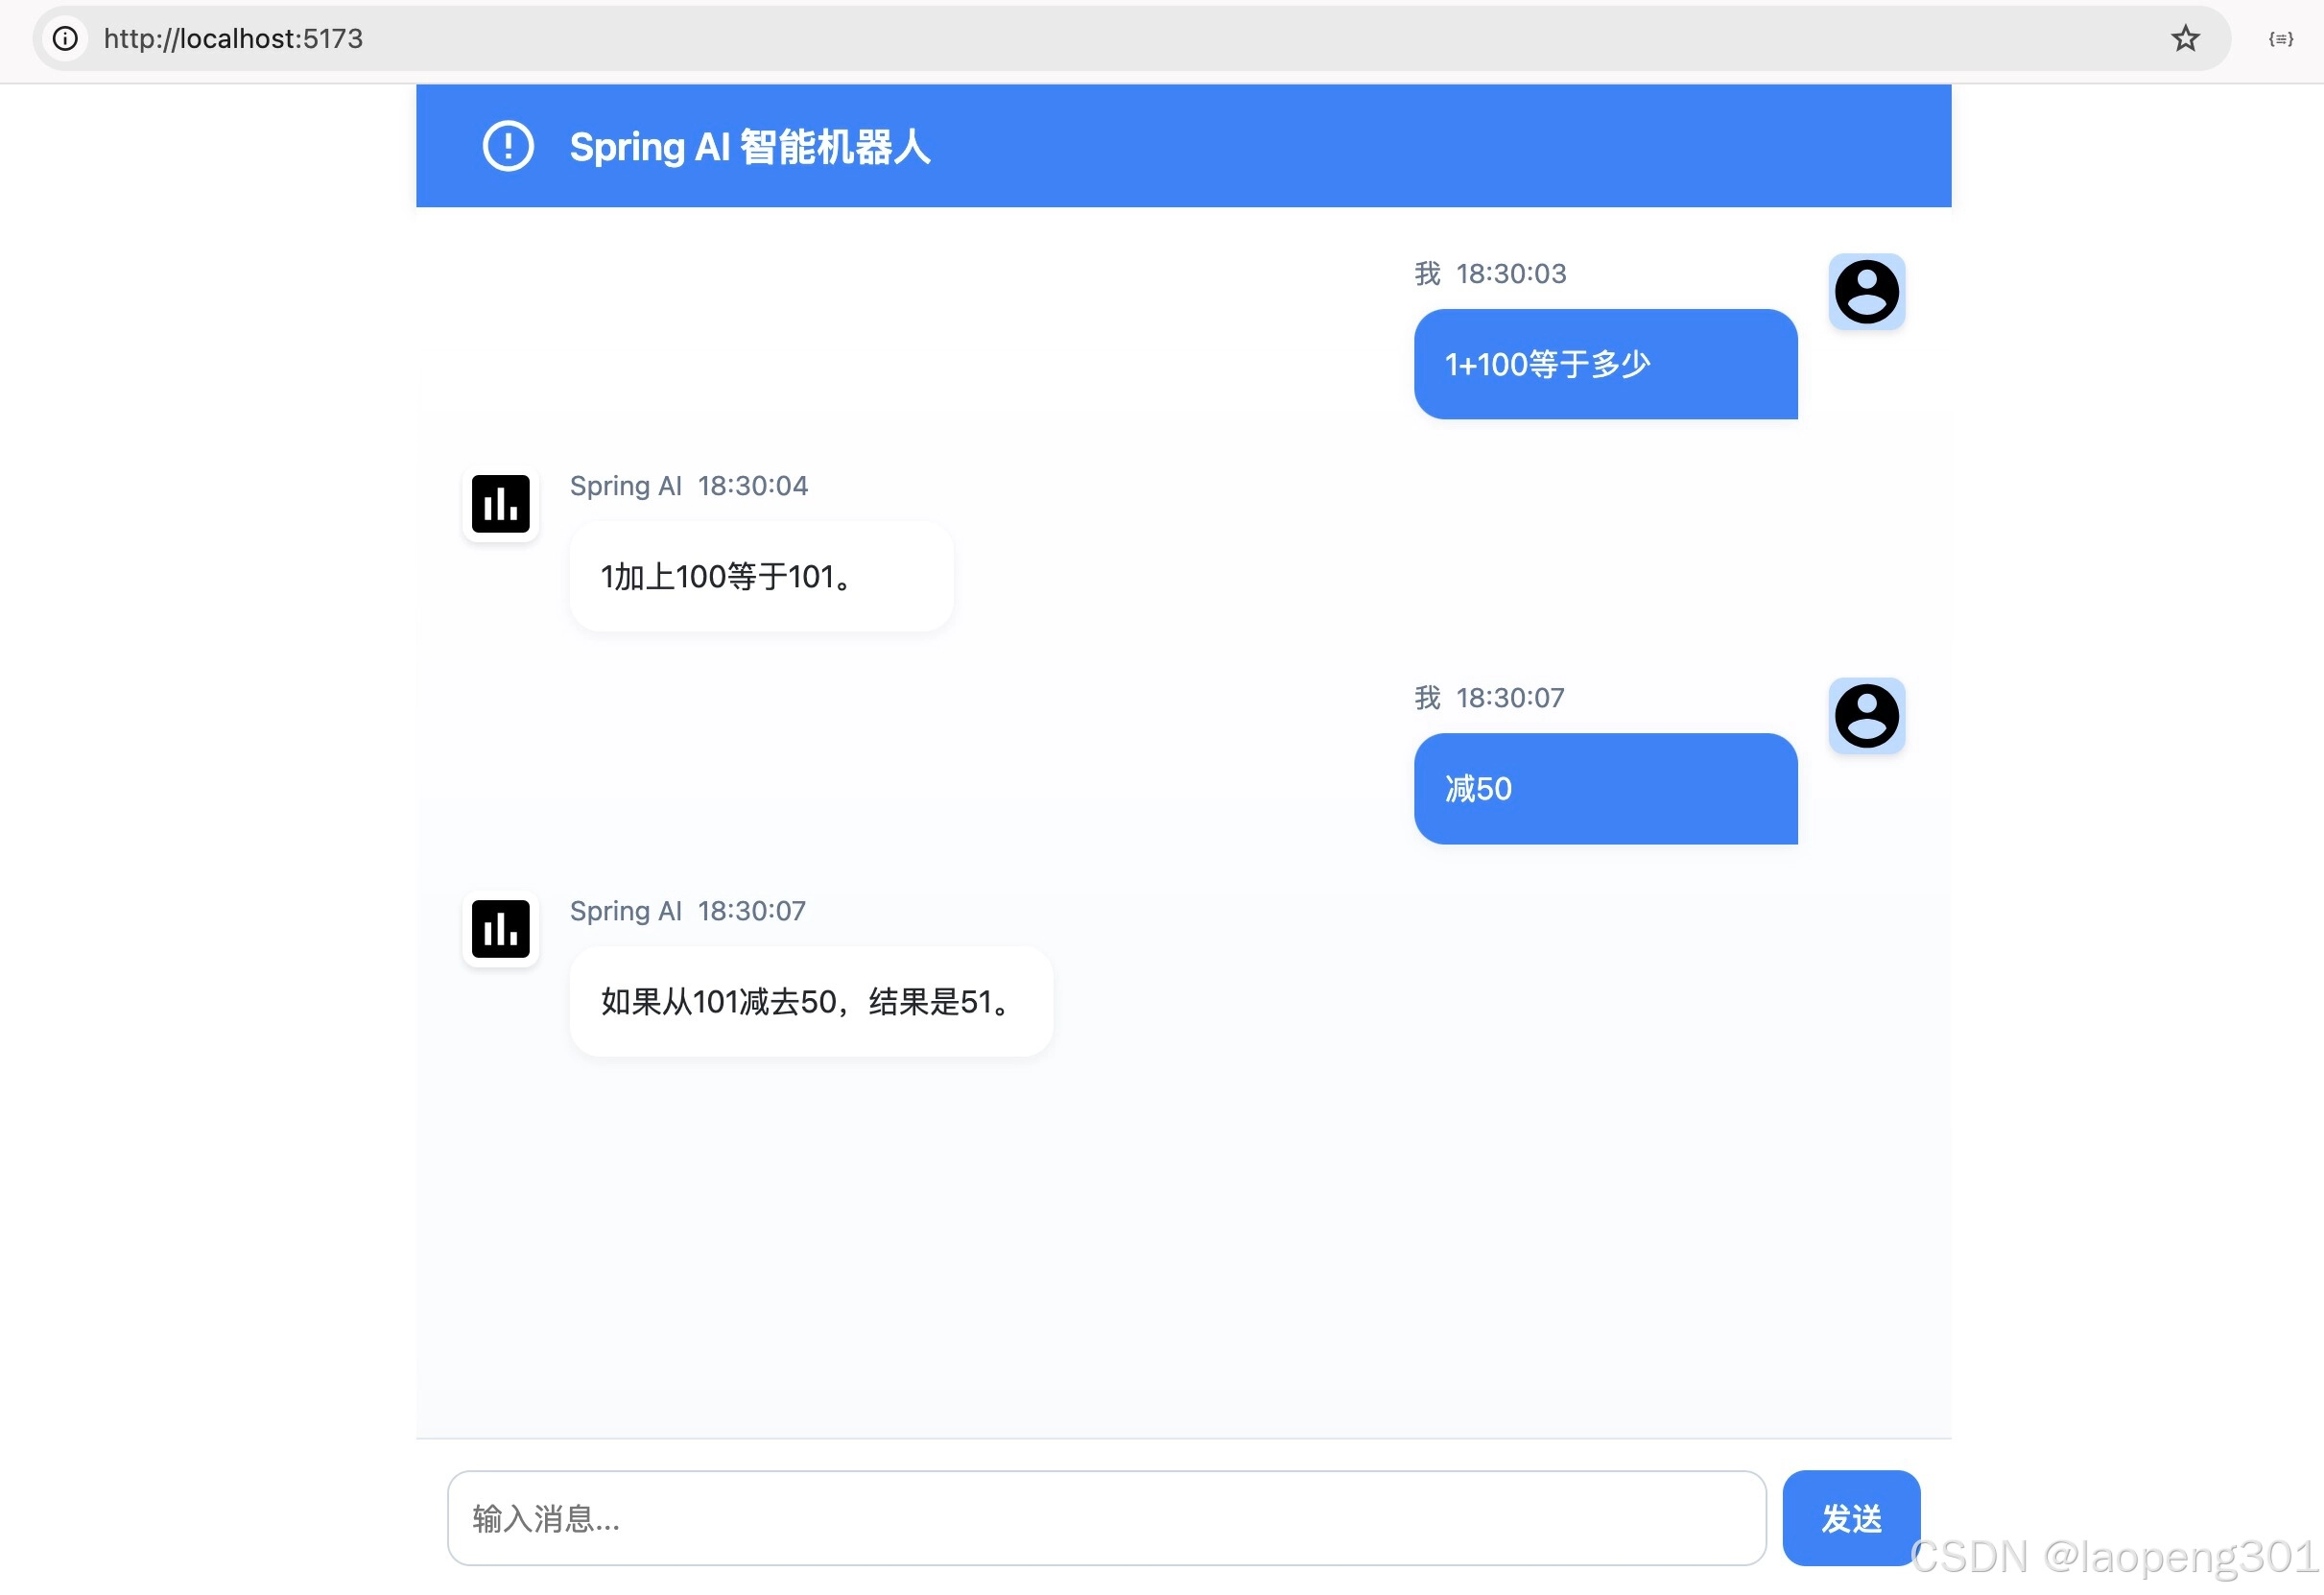
Prompt中。修改后实现的支持对话记忆的功能:
[
](https://i-blog.csdnimg.cn/direct/2e65d3f207c54c0ba3af19a67c9b508f.png)
这样就实现了上下文记忆。
四、总结#
本文详细介绍了如何使用
Spring AI 快速搭建一个具备自然语言处理能力的智能对话机器人,并结合 Vue 3 + TypeScript 实现前后端交互。
评论加载中…